There is nothing quite like a perfectly constructed breakfast burritos recipe to start your day. Imagine a handheld masterpiece where every bite offers a symphony of textures: the crunch of a toasted tortilla, the silkiness of soft-scrambled eggs, and the salty snap of mahogany-colored bacon. This isn’t just a wrap; it is a culinary architecture project designed for the ultimate morning experience.
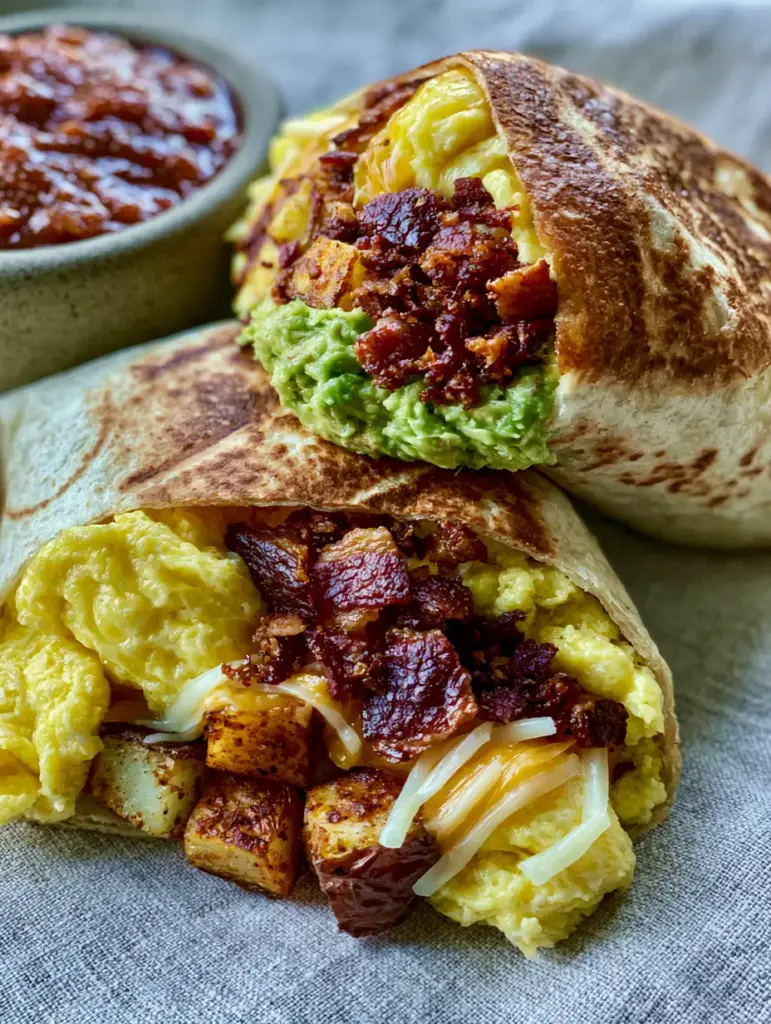
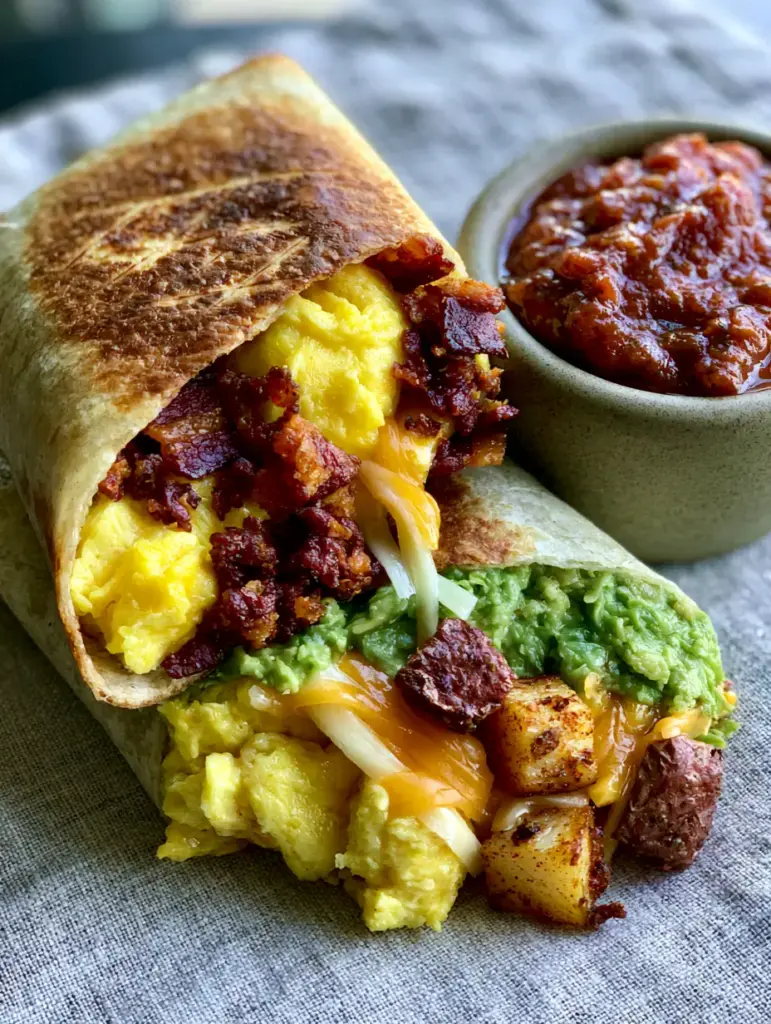
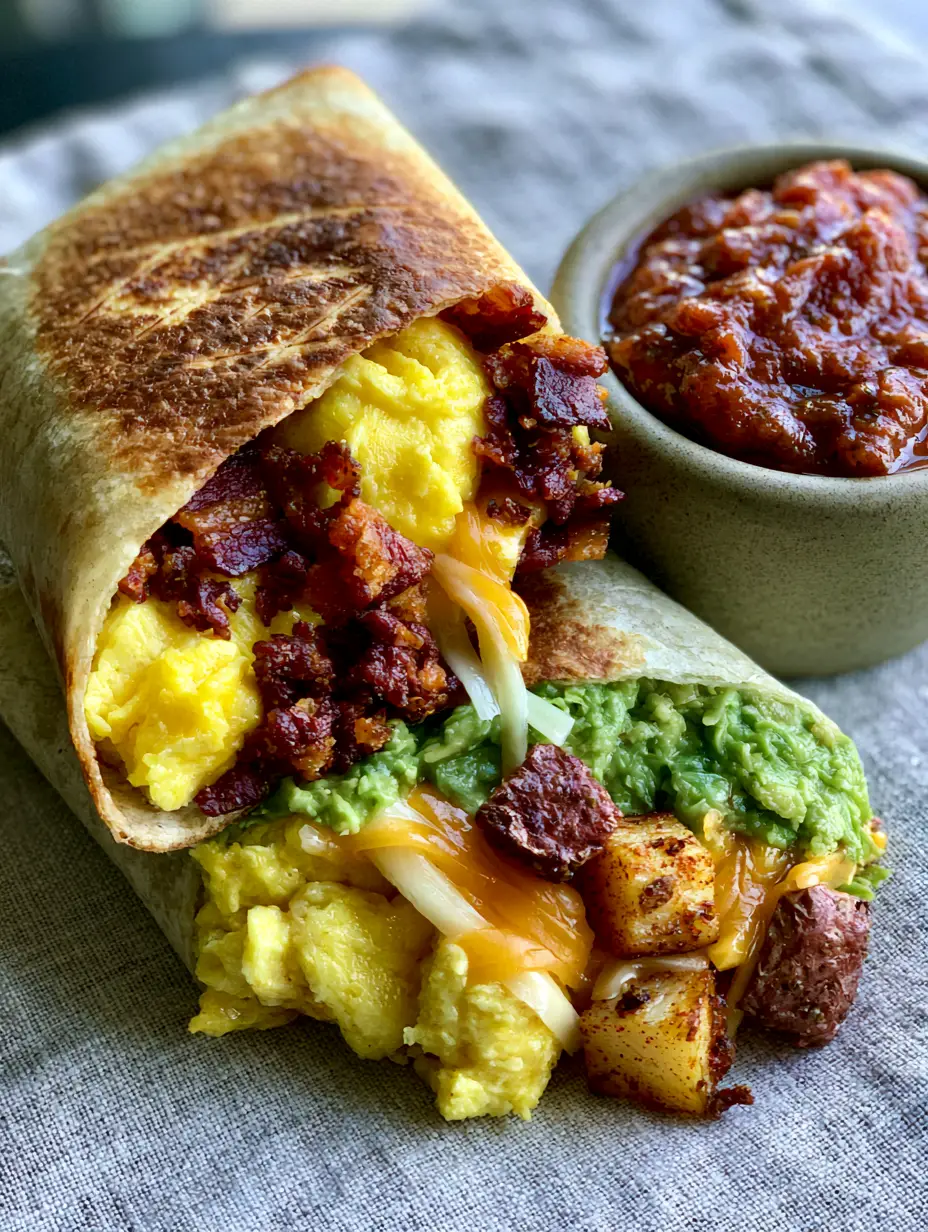
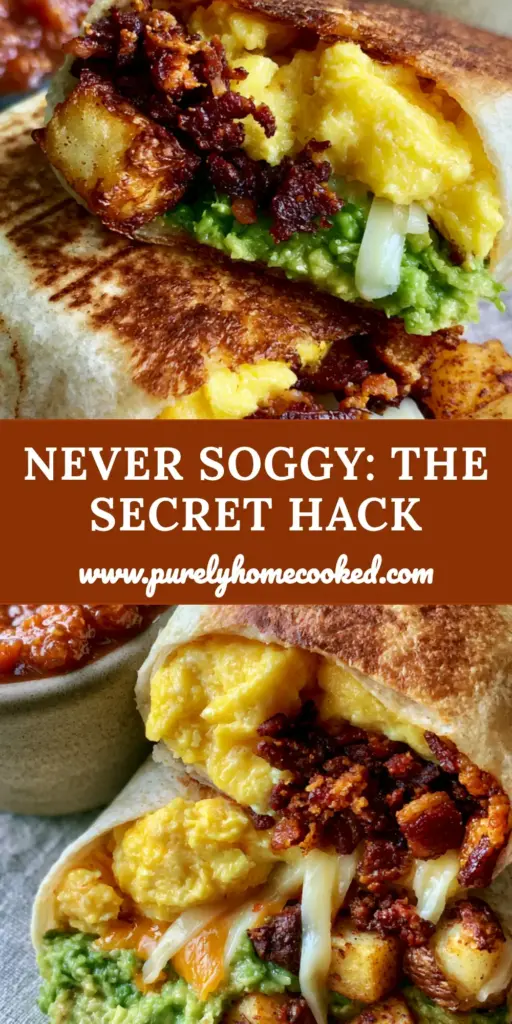
The secret to a truly elite breakfast burritos recipe lies in the “cross-section.” When you slice this burrito in half, you should see meticulous layers of vibrant green avocado, sharp white cheddar, and golden roasted potatoes. Using a moisture-barrier technique ensures your tortilla remains crispy on the outside while the interior stays lush and flavorful.
Inspired by professional griddle-style preparations, this recipe focuses on “sensory cues.” We are looking for those faint, golden-brown griddle marks and the specific sizzle of bacon reaching its peak mahogany hue. Whether you are prepping for a busy week or hosting a slow brunch, this method guarantees a restaurant-quality result every single time.
Why This Is the Only Breakfast Burritos Recipe You Need
- The Moisture Barrier Strategy: We use smashed avocado as a protective layer to prevent the salsa and eggs from making the tortilla soggy.
- Textural Contrast: Small cubes of russet potatoes are oven-roasted for a glass-like outer crunch and a fluffy interior.
- Chef-Level Scramble: Learn the low-and-slow technique for bright yellow, soft-scrambled eggs that look like ribbons of silk.
- The Griddle Finish: Instead of a soft wrap, we toast the flour tortilla to achieve a crispy, structural integrity that holds up to the last bite.
The Anatomy of an Elite Breakfast Burrito: Ingredients and Substitutions
Large Flour Tortillas: You need 10-inch (25cm) “burrito size” tortillas. These provide enough surface area for folding and are sturdy enough to handle the gridding process without tearing.
Russet Potatoes: 2 large russet potatoes (approx. 500g) are essential for their high starch content. This starch is what allows us to achieve those crispy, golden-brown edges in the oven.
Thick-Cut Bacon: 8 slices (approx. 340g) of mahogany-colored bacon provide the savory backbone. Thicker cuts hold their shape better and offer a more substantial “snap” when crumbled.
Extra Large Eggs: 6 to 8 fresh eggs (approx. 350-450g) form the heart of the filling. We scramble these with a touch of heavy cream for that signature fluffy, bright yellow appearance.
Sharp White Cheddar: 1.5 cups (150g) of freshly grated white cheddar. Avoid pre-shredded cheese; it’s coated in cellulose which prevents that perfect, stringy melt you see in the photos.
Hass Avocados: 2 ripe Hass avocados (approx. 300g). These are smashed with a pinch of salt to act as the “sealant” between the tortilla and the warm fillings.
Fire-Roasted Tomato Salsa: 1 cup (240ml) of thick, chunky salsa. The “fire-roasted” element adds a smoky depth that complements the toasted tortilla and roasted potatoes perfectly.
Fresh Cilantro: 1/4 cup (10g) of chopped cilantro flakes. This adds a bright, herbaceous finish that cuts through the richness of the cheese and bacon.
Foundational Additions: You will also need 2 tbsp (30ml) of olive oil for the potatoes, 1 tbsp (15g) of unsalted butter for the eggs, and sea salt and cracked black pepper for seasoning throughout.
Essential Tools for Visual Perfection
To achieve the look of our breakfast burritos recipe, you’ll need a large rimmed baking sheet for the potatoes. A non-stick skillet or a heavy-duty cast-iron griddle is vital for getting those faint griddle marks on the tortilla.
A sharp chef’s knife is non-negotiable for dicing the potatoes into uniform 1/2-inch (1.25cm) cubes. Consistency in size ensures every potato piece cooks at the same rate, preventing a mix of burnt and raw bits. Finally, a silicone spatula will help you “fold” the eggs gently to maintain their volume.
Mastering the Components: A Step-by-Step Guide
Achieving the Perfect Roasted Potato Cubes
Preheat your oven to 425°F (220°C). Toss your 1/2-inch (1.25cm) russet potato cubes with olive oil, salt, and pepper on a baking sheet. Roast for 20-25 minutes, tossing halfway through, until they are deep golden-brown and sound “hollow” when tapped.
If you love potatoes as much as we do, you might also enjoy our crispy potato balls recipe for a fun side dish. The key is removing as much moisture as possible before roasting to ensure maximum crunch.
The Art of Mahogany Bacon and Soft Scrambled Eggs
While the potatoes roast, lay your bacon in a cold skillet and turn the heat to medium. This “cold start” renders the fat slowly, resulting in mahogany-colored, ultra-crispy strips. Once cooled, crumble them into large, bite-sized pieces.
For the eggs, whisk them with a splash of cream. Melt butter in a non-stick pan over medium-low heat. Use a silicone spatula to push the eggs from the edges to the center, creating large, soft ribbons. Remove them from the heat while they still look slightly “wet”—residual heat will finish the job without making them rubbery.
Assembling for Structural Integrity
Warm your tortillas slightly to make them pliable. Spread a thick layer of smashed avocado in the center—this is your moisture barrier. Layer the soft-scrambled eggs over the avocado, followed by the roasted potatoes, crumbled bacon, and a generous handful of white cheddar.
Folding is a three-step process: fold the sides in first, then tuck the bottom flap over the filling and roll tightly. This creates a “bundle” that won’t leak when you hit the griddle.
The Final Griddle and Sear
Place the burritos seam-side down on a hot, dry griddle or cast-iron skillet. Press down lightly with a weight or another heavy pan. Sear for 1-2 minutes per side until the tortilla is crispy and shows those iconic griddle marks. This step also ensures the white cheddar inside is completely melted and gooey.
Expert Tips for a Fail-Proof Breakfast Burritos Recipe
- The Temperature Gradient: Ensure your potatoes are hot when you assemble. The heat from the potatoes helps melt the cheese from the inside out, while the griddle crisps the outside.
- Salsa Placement: Always serve the fire-roasted salsa on the side in a ramekin. Adding it inside the burrito before gridding can lead to “steam pockets” that soften the tortilla.
- The Avocado Seal: Always place the avocado directly against the tortilla. Its high fat content prevents the moisture from the eggs from penetrating the flour wrap.
- Don’t Overfill: It’s tempting to pack it full, but leave at least 2 inches (5cm) of border. A burrito that can’t close properly won’t sear evenly on the griddle.
How to Store and Reheat Your Burritos
This breakfast burritos recipe is excellent for meal prep. Allow the burritos to cool completely before wrapping them tightly in foil. They can be stored in the refrigerator for up to 4 days or in the freezer for up to 3 months.
To reheat from frozen, remove the foil and wrap in a damp paper towel. Microwave for 2 minutes, then finish them in a dry skillet for 2 minutes per side to regain that toasted, crispy exterior. This “dual-method” reheating preserves the texture of the soft eggs and the crunchy tortilla.
Creative Pairings: What to Serve with Breakfast Burritos
While these burritos are a meal on their own, a complete brunch spread makes a world of difference. Pair your burrito with a refreshing beverage like our chilled coffee frappe to balance the savory richness of the bacon and cheese.
If you are looking for more vegetable-forward options, consider serving a side of vinegar-based cucumber and onion salad. The acidity of the vinegar cuts through the fat of the avocado and cheddar, cleansing the palate between bites. For a heartier spread, a small portion of spicy shakshuka can serve as a dip for the ends of your burrito.
Frequently Asked Questions
Yes! Wrap them tightly in foil and store in a freezer bag. To reheat, microwave for 2 minutes followed by a quick sear in a hot skillet to restore the crispy texture of the tortilla.
While optional, griddling the burrito seam-side down ‘welds’ the tortilla shut and adds a crucial textural element that elevates the recipe to restaurant quality.
The key is using a ‘moisture barrier’ like smashed avocado or a thin layer of cheese directly against the tortilla. Also, ensure all cooked ingredients (like potatoes and eggs) are slightly cooled and drained of excess oil before assembly.
A sharp white cheddar is ideal because it provides a strong flavor that stands up to the bacon. Always grate it yourself for the best melting properties.
Russet potatoes have a higher starch content, which allows them to get significantly crispier when roasted in the oven compared to waxy red potatoes.
The Master Breakfast Burritos Recipe Card
Breakfast Burritos Recipe: The Ultimate Crispy, Layered Morning Feast
Ingredients
Equipment
Method
- Preheat oven to 425°F (220°C). Toss diced russet potatoes with olive oil, salt, and pepper. Spread on a baking sheet and roast for 20-25 minutes until deep golden-brown and crispy.
- Place bacon in a cold skillet. Turn heat to medium and cook until mahogany-colored and crispy. Drain on paper towels and crumble.
- Whisk eggs with a splash of cream. Melt butter in a non-stick pan over medium-low heat. Cook eggs slowly, folding gently with a spatula until they form soft, bright yellow ribbons.
- Spread smashed avocado on a warm tortilla. Layer with eggs, roasted potatoes, crumbled bacon, and white cheddar. Fold the sides in and roll tightly.
- Place burritos seam-side down on a hot griddle. Press lightly and sear until the tortilla has golden-brown griddle marks and the cheese is melted.
Notes
The avocado acts as a moisture barrier to keep the tortilla crispy.
Closing & Call to Action
Elevating your morning routine starts with mastering the breakfast burritos recipe. By focusing on the layering of the sharp white cheddar, the mahogany bacon, and that crucial avocado moisture barrier, you transform a simple wrap into a gourmet experience. The contrast between the griddled tortilla and the soft-scrambled eggs is something your family will ask for every weekend.
Did you try the griddle-press technique? Let us know in the comments below! If you loved the visual “cross-section” of this dish, make sure to follow us on Pinterest and share your creations with the community. Happy cooking!