Planning the perfect celebration starts with iconic Hello Kitty Birthday Party Ideas that blend nostalgia with a modern, high-end boutique aesthetic. Whether you are hosting a first birthday or a sophisticated “grown-up” Sanrio soirée, the centerpiece is always the cake. This DIY aesthetic cake hack transforms a simple sponge into a professional-grade masterpiece that looks like it stepped right out of a Tokyo bakery.
In the world of Pinterest-perfect celebrations, “minimalism” is the new “maximalism.” Gone are the days of over-the-top, messy character cakes. Today’s trend focuses on clean lines, high-contrast colors, and fresh, organic elements. This recipe focuses on that exact “boutique” look—using high-gloss accents and vibrant fruit to create a character tribute that is as elegant as it is delicious.
By mastering this specific design, you’ll discover that you don’t need a professional pastry degree to achieve stunning results. We are stripping back the complexity to focus on texture, light, and the iconic “cherry red” and “petal pink” color palette. Let’s dive into how you can create this showstopper at home using our curated Hello Kitty Birthday Party Ideas.
Why This Minimalist Hello Kitty Design Is the Ultimate Party Hack
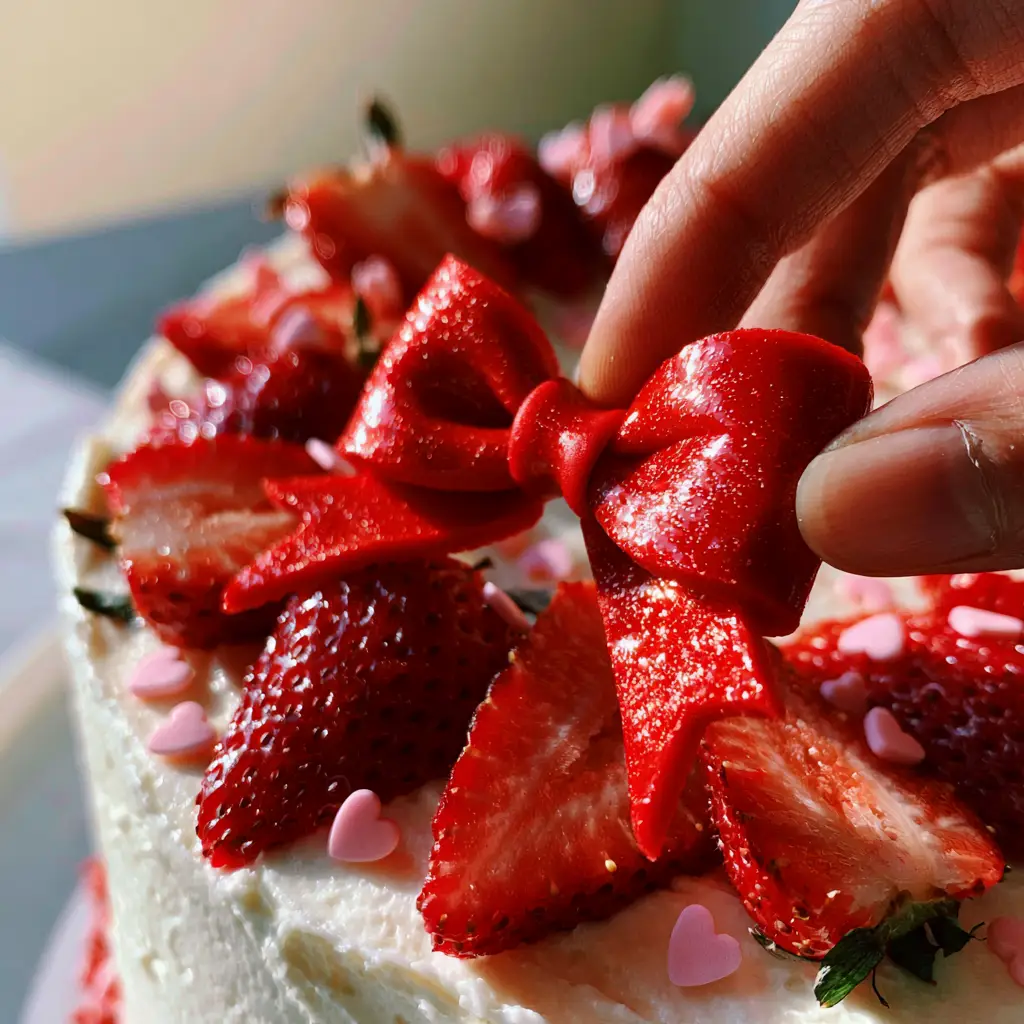
- High-Contrast Visual Appeal: The stark white buttercream serves as a canvas for the vibrant cherry red of the fondant bow and the fresh strawberries.
- Accessible Luxury: Uses standard baking ingredients paired with strategic garnishes to mimic a $200 custom-ordered boutique cake.
- Texture-Driven Design: Combines the creaminess of whipped frosting with the glossy sheen of sculpted fondant and the matte finish of sugar heart sprinkles.
- Time-Efficient Decorating: Unlike complex piping, this design relies on clean placement and fresh fruit, making it perfect for busy party planners.
The Foundation: Essential Ingredients for the Perfect Canvas
To execute these Hello Kitty Birthday Party Ideas, you need a cake that is structurally sound yet incredibly light. We use a minimalist round sponge cake base that provides a flat, even surface for our minimalist decorations.
Cake Flour: 2 ¼ cups (280g). Unlike all-purpose flour, cake flour has a lower protein content, ensuring the sponge remains delicate and fine-pored. This is essential for the “clean” look of a minimalist cake when sliced.
Granulated Sugar: 1 ½ cups (300g). This provides the necessary sweetness and helps in the aeration process when creamed with butter. It creates the structural “lift” needed for a tall, impressive round base.
Unsalted Butter, Softened: 1 cup (226g). High-quality butter provides the richness and the “melt-in-your-mouth” texture. Ensure it is at room temperature (around 68°F / 20°C) for optimal emulsion with the sugar.
Whole Milk: ¾ cup (180ml). This adds moisture and fat, contributing to the soft crumb of the sponge. For an even richer flavor, you could substitute this with buttermilk if you prefer a slight tang.
Large Eggs: 3 units. Eggs act as the binder and the primary leavening agent. They provide the protein structure that allows the cake to hold its shape under the weight of the buttercream.
Pure Vanilla Extract: 2 tsp (10ml). This is the primary flavor profile. Using a clear vanilla extract can help keep the internal crumb as white as possible, matching the exterior aesthetic.
Baking Powder: 2 ½ tsp (12g). This “invisible” scientific requirement ensures the cake rises evenly without a large dome. We want a flat surface for our Hello Kitty Birthday Party Ideas cake hack.
Fine Sea Salt: ½ tsp (3g). Salt enhances all the other flavors and balances the sweetness of the sugar. It is the secret to a professional-tasting sponge.
Achieving the “Boutique White” Smooth Buttercream
The visual success of this cake depends entirely on the “smooth white vanilla buttercream” mentioned in our blueprint. To achieve a truly white frosting—rather than a yellow-tinted one—you must beat the butter for at least 8-10 minutes before adding sugar.
Powdered Sugar: 4 cups (500g). Sifted three times to ensure there are zero lumps. This creates that “creamy texture” highlighted in the daylight photography.
Heavy Cream: 2-3 tbsp (30-45ml). This allows you to adjust the consistency. You want a frosting that is stiff enough to hold its shape but soft enough to be smoothed to a glass-like finish.
Bright White Food Gel (Optional): 1 drop. A tiny drop of violet or specialized white food coloring can neutralize the natural yellow tint of the butter, giving you that high-end boutique look.
Iconic Garnishes: The Hello Kitty Aesthetic Elements
Red Fondant: 4 oz (115g). This is used to create the “glossy red fondant bow.” Using pre-colored fondant ensures a deep, vibrant cherry red that is difficult to achieve with liquid dyes at home.
Fresh Sliced Red Strawberries: 1 cup (150g). Look for strawberries with a deep red color throughout. Slicing them vertically preserves the heart-like shape, which complements the overall theme.
Tiny Pink Heart-Shaped Sugar Sprinkles: 2 tbsp (25g). These “petal pink” accents provide a delicate contrast to the bold red. They should be scattered with “intentional randomness” to look professional.
The Essential Tool Kit for Cake Success
To achieve the “DIY cake hack” look, you need the right equipment. Using a rotating cake stand (turntable) is non-negotiable for achieving that perfectly smooth white vanilla buttercream finish. You will also need an offset spatula to spread the frosting and a bench scraper to smooth the sides.
For the “perfectly sculpted” bow, a small fondant rolling pin and a sharp paring knife are required. If you’re looking for more party inspiration beyond the cake, check out our guide on pink and purple birthday party ideas (coming soon) for color palette coordination. This cake fits perfectly within a broader Sanrio-themed event.
Step-by-Step Instructions for the Minimalist Hello Kitty Cake
1. Preparing the Minimalist Sponge Base
Preheat your oven to 350°F (175°C). Grease and line two 6-inch (15cm) round cake pans with parchment paper. This size creates a “tall and tight” boutique look that is very popular in modern Hello Kitty Birthday Party Ideas.
Cream the butter and sugar together until the mixture is pale and voluminous (about 5 minutes). Add eggs one at a time, followed by the vanilla. Sift in the dry ingredients, alternating with the milk. Mix until just combined to avoid a tough crumb.
Divide the batter evenly and bake for 25-30 minutes. The sensory cue to look for is a light golden surface that springs back when touched. Allow the cakes to cool completely before leveling the tops with a serrated knife.
2. Mastering the Smooth Buttercream Finish
Beat your softened butter on high speed for 8 minutes until it looks almost white. Gradually add the powdered sugar and heavy cream. Continue beating until the frosting is silky and air-bubble-free.
Stack your cake layers with a thin layer of buttercream in between. Apply a “crumb coat”—a thin layer of frosting to seal in crumbs—and refrigerate for 20 minutes. This is a crucial step for a clean, minimalist result.
Apply the final layer of buttercream. Use your bench scraper while rotating the turntable to create a “smooth white” surface. The goal is a clean, neutral cream background that lets the red accents pop.
3. Sculpting the Glossy Red Fondant Bow
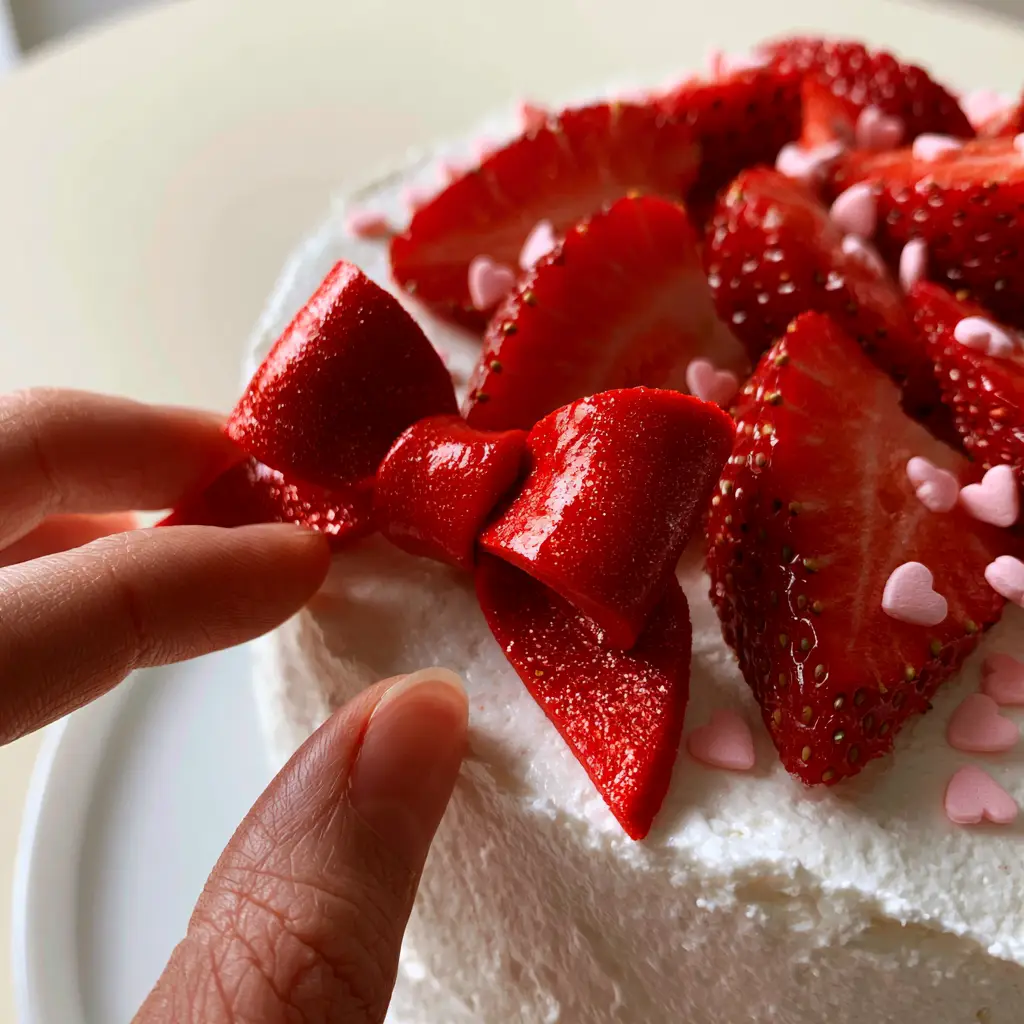
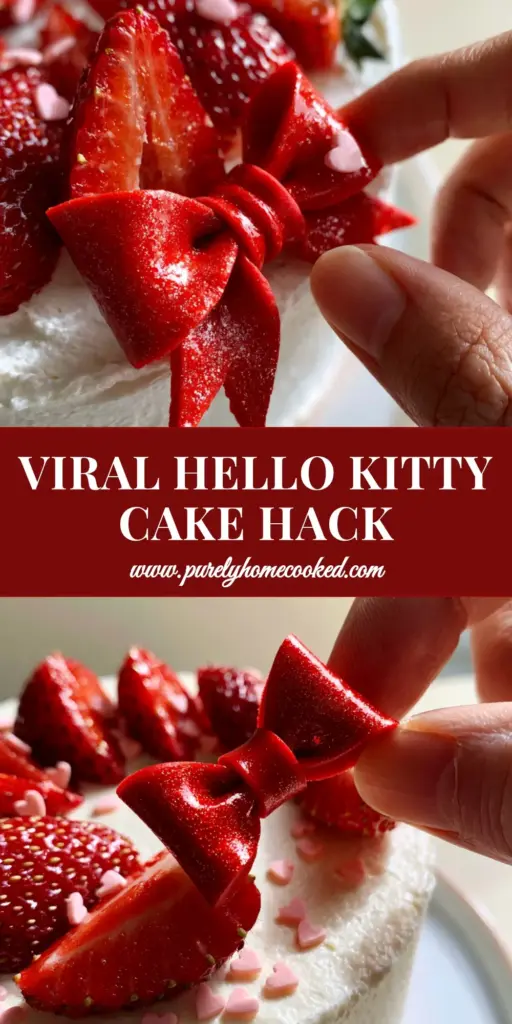
Roll out your red fondant to a thickness of 1/8 inch (3mm). Cut two long rectangles and one small square. Fold the rectangles into loops and pinch the centers to create the “bow” shape. Wrap the small square around the center to hide the seams.
To achieve the “glossy” finish seen in the Hello Kitty Birthday Party Ideas photography, lightly steam the bow or brush it with a tiny amount of vegetable shortening. This gives it a high-shine, high-contrast look against the matte frosting.
4. The Final Garnish: Strawberries and Sprinkles
Slice your fresh strawberries into even, vertical slices. These should look “vibrant and juicy” under natural light. Just before serving, place the fondant bow on the top-right side of the cake (the iconic Hello Kitty position).
Arrange the strawberry slices in a minimalist semi-circle or cluster. Finally, delicately place the tiny pink heart-shaped sugar sprinkles around the strawberries. Use a light hand—the “minimalist” aesthetic thrives on white space.
Expert Tips for a Professional Finish
- The Morning Light Secret: To capture the “soft, natural morning daylight” look for your own photos, place your cake near a north-facing window. This highlights the “creamy texture” without harsh shadows.
- Fondant Stability: Never store a fondant-decorated cake in a humid refrigerator for long periods, or the bow may “weep” or lose its gloss. Add the bow as the final “action” garnish.
- Strawberry Freshness: Only slice the strawberries right before decorating. If they sit too long, the juice will run into the white buttercream, ruining the high-contrast look.
- Color Theory: Stick to the “cherry red” and “petal pink” palette. Adding too many colors will detract from the high-end boutique feel of these Hello Kitty Birthday Party Ideas.
Storage, Reheating, and Make-Ahead Advice
The sponge base can be made up to 2 days in advance. Wrap the layers tightly in plastic wrap and store at room temperature. This actually makes the cake easier to trim and frost.
Once frosted, the cake can stay at room temperature for up to 4 hours if the environment is cool. For longer storage, keep it in an airtight container in the fridge. Note that the fresh strawberries will only stay “vibrant” for about 12-24 hours after being sliced.
If you have leftover sponge pieces from leveling the cake, they make excellent stoner snacks when dipped in leftover buttercream or a bit of strawberry jam.
What to Serve With Your Hello Kitty Masterpiece
When planning your Hello Kitty Birthday Party Ideas, think about the full menu. For a balanced brunch party, you might start with a fluffy pancake recipe to keep the “soft and airy” theme going. If you want more character-themed treats, consider adding a SpongeBob and Patrick birthday cake to your dessert table for a full “cartoon nostalgia” vibe.
For a more sophisticated afternoon tea, pair this strawberry cake with light savory bites. A minimalist cake pairs beautifully with the clean presentation of Sanrio-themed finger sandwiches or even a light fruit salad using the remaining strawberries.
Frequently Asked Questions
Yes, sculpting the bow 24-48 hours in advance allows it to dry and hold its shape better. Store it in a cool, dry place (not the fridge) to maintain its gloss.
The secret is beating the butter alone for 8-10 minutes before adding sugar. This aerates the fat, turning it from yellow to ivory. You can also add a microscopic drop of violet food gel to neutralize yellow tones.
Ensure your cake is well-chilled before adding the bow. For extra safety, you can place a small piece of parchment paper or a thin layer of white chocolate under the bow to act as a barrier.
Slice them vertically from the tip to the stem. This preserves the natural heart shape of the fruit, which perfectly complements the Sanrio aesthetic.
Tall, 6-inch round cakes are currently the gold standard for ‘aesthetic’ cakes. They provide a more modern, high-end silhouette than standard 8-inch or 9-inch pans.
The Ultimate DIY Hello Kitty Cake Recipe
Hello Kitty Birthday Party Ideas: The Ultimate DIY Minimalist Strawberry Cake Hack
Ingredients
Equipment
Method
- Cream butter and sugar until pale and fluffy. Add eggs and vanilla, beating well after each addition.
- Fold in sifted dry ingredients and milk. Bake at 350°F (175°C) for 25-30 minutes until golden.
- Whip buttercream until white. Apply a crumb coat, then a thick final layer. Use a bench scraper to achieve a smooth finish.
- Roll red fondant and fold into a bow shape. Brush with a tiny bit of shortening for a glossy finish.
- Delicately place the bow, strawberry slices, and heart sprinkles on the cake as shown in the visual blueprint.
Notes
Always add fresh strawberries at the last minute to prevent bleeding into the frosting.
Closing & Call to Action
Creating professional-looking Hello Kitty Birthday Party Ideas at home is all about focusing on quality ingredients and minimalist design. This cake hack proves that with a few “glossy” accents and fresh fruit, you can achieve a boutique aesthetic that will be the talk of the party. The high-contrast cherry red against the petal pink creates a timeless look that fans of all ages will adore.
Did you try this DIY cake hack? We would love to see your results! Leave a comment below or share your photos with us on Pinterest. For more aesthetic party inspiration and “purely home-cooked” recipes, be sure to sign up for our newsletter!