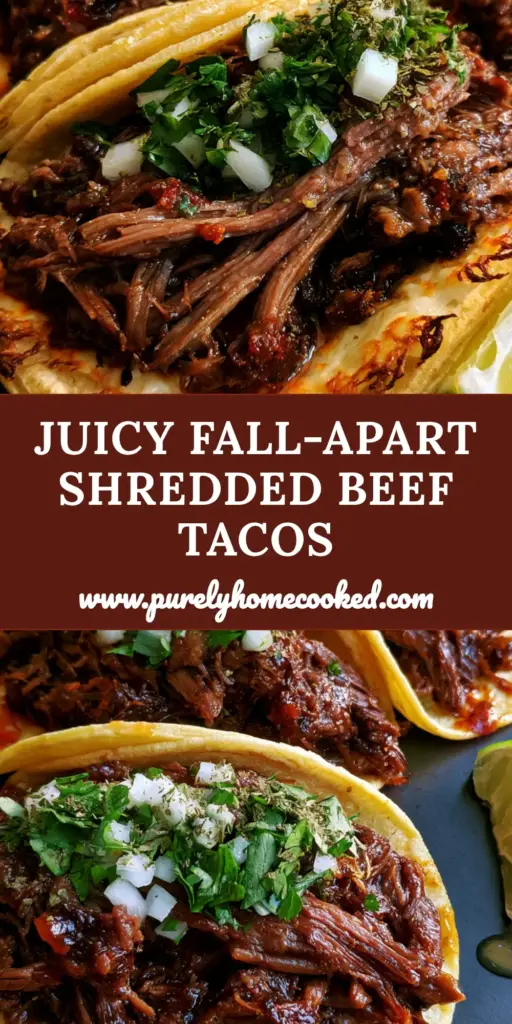
There is a specific kind of culinary magic that happens when a humble chuck roast meets a slow, aromatic braise. These shredded beef tacos aren’t just a meal; they are a masterclass in texture, featuring long-strand beef that glistens with red chili oil and tortillas seared to a lacquered, golden crisp.
If you have ever stared at a photo of street tacos and wondered how they achieved those perfectly lacy, crispy cheese edges, you are in the right place. We are breaking down the forensic details of the perfect taco, from the deep mahogany hue of the meat to the vibrant emerald pop of fresh cilantro.
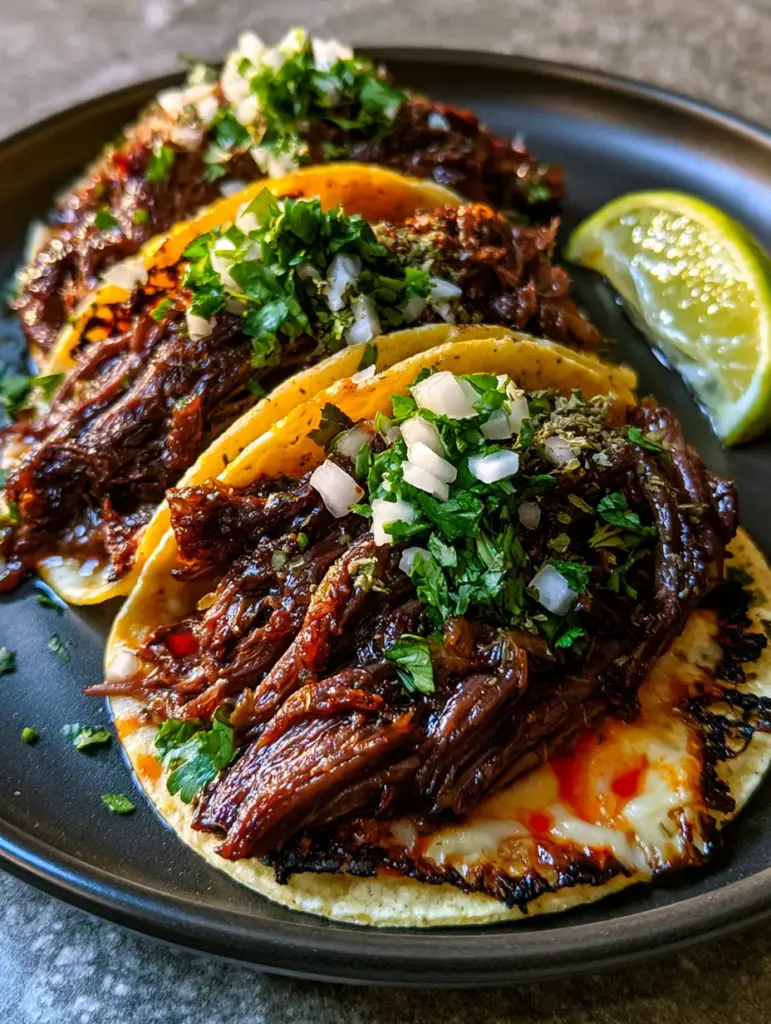
The Anatomy of the Ultimate Shredded Beef Taco
- Long-Strand Texture: By selecting a high-fat chuck roast and braising it until the connective tissue dissolves, we achieve succulent strands that hold onto the rich consomme.
- The Red Chili Glisten: A blend of toasted guajillo and ancho chiles creates a signature red oil that coats every fiber of the meat for maximum flavor delivery.
- The “Quesataco” Shell: We use a specialized dipping and searing technique to create a structural corn tortilla reinforced by a skirt of melted, crispy Oaxaca cheese.
- Aromatic Balance: The heavy, savory notes of the beef are cut by the sharp bite of finely diced raw white onion and a dusting of dried Mexican oregano.
- The Consomme Component: A dark red, highly concentrated dipping broth serves as both a cooking medium and a sidecar for the ultimate sensory experience.
Sourcing the Foundation: The Essential Ingredient List
3 lbs (1.36kg) Beef Chuck Roast: This cut is non-negotiable for shredded beef tacos because its high collagen content transforms into gelatin, providing that “glistening” moisture seen in our visual blueprint.
4 Dried Guajillo Chiles and 2 Dried Ancho Chiles: These provide the deep red color and mild, smoky heat; without them, you lose the signature red chili oil glisten that defines the dish.
12 oz (340g) Oaxaca Cheese: This Mexican melting cheese is the secret to the “lacey edges” because of its high moisture content and ability to stretch before it crisps on the griddle.
16 Small Corn Tortillas: Corn tortillas are essential for structural integrity when dipped in liquid; flour tortillas will become soggy and fall apart during the searing process.
1 Large White Onion: Half is used for the braise to provide sweetness, while the other half must be finely diced raw to provide the essential crunch and sulfuric bite.
1 Bunch Fresh Cilantro: The vibrant emerald green provides a visual and flavor contrast to the dark mahogany beef, acting as a palate cleanser between bites.
2 tbsp (10g) Dried Mexican Oregano: Unlike Mediterranean oregano, the Mexican variety has citrusy undertones that complement the lime juice droplets and beef fat perfectly.
4 cups (960ml) Beef Bone Broth: This forms the base of your dark red consomme; using a high-quality broth ensures a deeply savory finish that rivals any traditional beef gravy dinner.
4 Cloves Garlic and 2 Whole Cloves: These “invisible” aromatics provide the foundational scent that draws everyone to the kitchen the moment the pot begins to simmer.
2 tbsp (30ml) Neutral Oil: You need a high-smoke point oil to sear the beef initially, ensuring you develop that deep brown crust known as the Maillard reaction.
Precision Tools for Professional Results
To achieve the level of detail found in a professional macro shot, you need more than just a pan. A heavy-bottomed Dutch oven is required for even heat distribution during the long braise, preventing the bottom of the beef from scorching.
You will also need a fine-mesh strainer to produce the clear, dark red consomme; leaving large chunks of onion or chile in the broth will ruin the “glistening” visual effect. A flat cast-iron griddle is the best surface for searing the tortillas and achieving those crispy Oaxaca cheese skirts.
The Science of the Braise: Achieving Mahogany Perfection
Step 1: The Initial Sear and Maillard Development
Pat your chuck roast bone-dry with paper towels and season aggressively with salt. Heat 2 tbsp (30ml) of oil in your Dutch oven over medium-high heat until it just begins to shimmer.
Sear the beef for 5-7 minutes per side; you are looking for a dark mahogany crust. This isn’t just for color; this creates the complex flavor compounds that will eventually season your entire pot of shredded beef tacos.
Step 2: Rehydrating the Chile Base
While the beef sears, remove the stems and seeds from your dried chiles. Toast them in a dry pan for 30 seconds until fragrant, then submerge them in 1 cup (240ml) of boiling water for 10 minutes.
Blend the softened chiles with the soaking liquid, garlic, and Mexican oregano until completely smooth. This vibrant red paste is what creates the “red chili oil glisten” mentioned in our visual recipe blueprint.
Step 3: The Slow Transformation
Remove the beef from the pot and sauté half of your onion (sliced) until softened. Deglaze the pot with a splash of beef broth, scraping up all the brown bits from the bottom.
Return the beef to the pot, pour over the chile puree and the remaining beef broth. Cover and simmer on low for 3-4 hours, or until the beef literally falls apart when touched with a fork.
Mastering the Long-Strand Shredding Technique
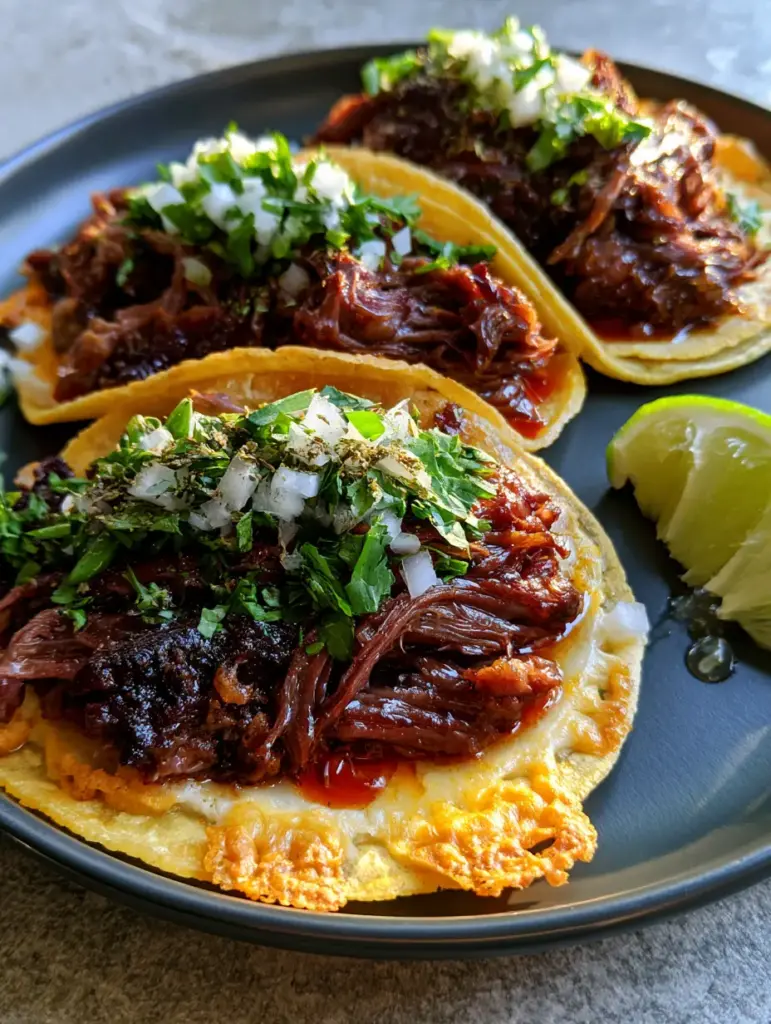
Once the beef is tender, remove it to a cutting board but do not reach for a knife. Use two large forks to pull the beef apart following the natural grain of the muscle fibers.
To match the visual blueprint, aim for “long-strand” shreds rather than chopped chunks. Return the shredded beef to the pot and let it sit in the warm liquid for 10 minutes to soak up the red oil and consomme.
The Griddle Ritual: Crispy Cheese and Seared Tortillas
Step 4: The Consomme Dip
Ladle the top layer of the braising liquid into a bowl. This top layer is naturally rich in the red chili oil that has separated during the cooking process.
Dip a corn tortilla into this liquid, coating both sides. Place it immediately onto a hot griddle. The fat in the consomme will fry the tortilla, creating a “seared” texture and deep orange color.
Step 5: The Oaxaca Cheese Lace
Immediately sprinkle a generous handful of shredded Oaxaca cheese onto the tortilla. Allow some of the cheese to spill over the edges onto the hot griddle surface.
As the cheese melts, it will form a crispy, lacey “skirt.” This provides a structural crunch that contrasts with the tender shredded beef tacos filling.
Expert Tips for Success
- Temperature Control: If your griddle is too hot, the consomme on the tortilla will burn before the cheese crisps. Aim for a steady medium heat.
- The Fat Cap: Do not trim all the fat off your chuck roast. That fat is what creates the “glistening” droplets of oil in the final presentation.
- Don’t Rush the Shred: If the beef is resisting the fork, it needs another 30 minutes. True long-strand beef should require almost zero effort to shred.
- Rest the Consomme: Let the broth sit for 5 minutes before serving so the red oil can rise to the top for that perfect macro-shot look.
Flavor Pairings and Serving Suggestions
While these shredded beef tacos are a meal in themselves, they pair beautifully with light, acidic sides. Consider serving them alongside a refreshing cucumber onion salad to cut through the richness of the beef fat.
If you’re looking for more ways to use high-quality beef, you might enjoy a honey garlic beef rice bowl for a weeknight alternative, or even use the leftover shredded beef in savory beef mini pies. For a quick snack while you wait for the braise, these easy stoner snacks are a great way to keep the hunger at bay.
Storage and Reheating Advice
The beef and consomme store beautifully in the refrigerator for up to 4 days. In fact, the flavor often improves on day two as the spices continue to meld.
To reheat, always do so in a pan with a splash of the consomme. Avoid the microwave if possible, as it can turn the long-strand beef rubbery. To freeze, store the shredded beef and consomme separately in airtight containers for up to 3 months.
Frequently Asked Questions
Yes, you can braise the beef in a slow cooker on low for 8 hours. However, you must still perform the initial sear in a pan to achieve the dark mahogany color and deep flavor profile.
The secret is using Oaxaca cheese and allowing it to touch the hot griddle directly. Sprinkle the cheese so it overlaps the edge of the tortilla; as the fat renders, it fries the cheese into a crispy, golden lace.
If you cannot find Oaxaca, a high-quality whole-milk Monterey Jack or Mozzarella is a good substitute, though they may not produce the exact lacey edges as effectively.
Beef chuck roast is the ideal cut. It has the perfect balance of fat and connective tissue that breaks down during a slow braise, resulting in the glistening, long-strand texture seen in high-end street tacos.
Dipping the tortilla in the consomme (specifically the fatty top layer) coats it in red chili oil. This seasons the tortilla and allows it to fry on the griddle, creating a crispy, flavorful shell that won’t break.
The Ultimate Shredded Beef Tacos Recipe
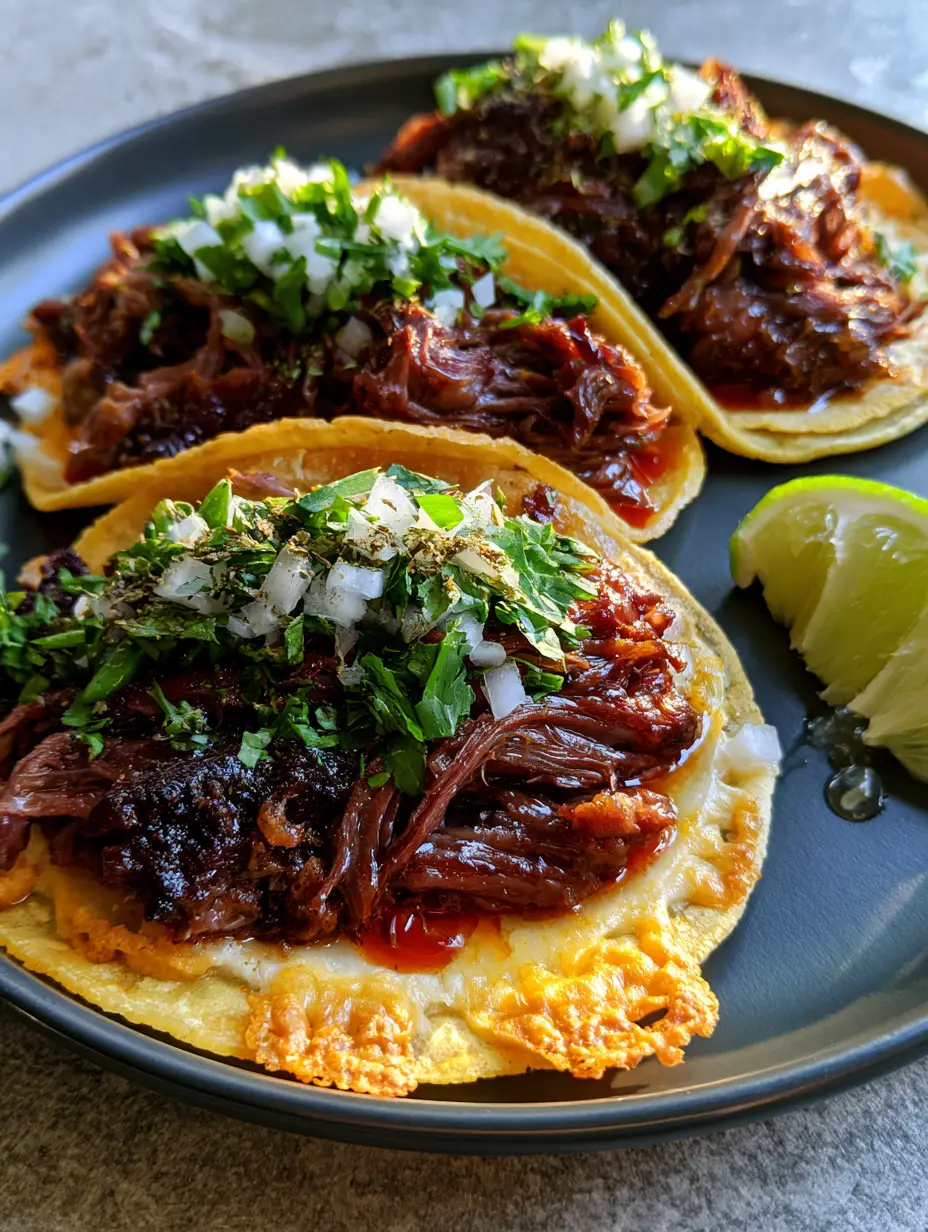
Shredded Beef Tacos with Crispy Oaxaca Cheese and Rich Consomme
Ingredients
Equipment
Method
- Heat oil in a Dutch oven. Season beef with salt and sear on all sides until a dark mahogany crust forms. Remove beef from the pot.
- Toast dried chiles, soak in hot water for 10 minutes, then blend with garlic and oregano until smooth.
- Add sliced onions to the pot, sauté, then add the chili paste and beef broth. Return beef to pot, cover, and simmer for 3-4 hours.
- Remove beef and use two forks to shred into long, tender strands. Return to the liquid to absorb the red chili oil.
- Dip each tortilla into the top layer of consomme. Place on a hot griddle, add shredded Oaxaca cheese, and allow to crisp.
- Fill with beef, fold, and cook until the cheese forms crispy lacey edges. Serve with a side of consomme, diced onions, cilantro, and lime juice droplets.
Notes
Use only corn tortillas for the correct structural integrity when searing.
Join the Purely Home Cooked Community
We hope these shredded beef tacos bring a burst of authentic flavor to your kitchen! The combination of glistening beef and crispy Oaxaca cheese is a guaranteed crowd-pleaser that looks as good as it tastes.
If you made this recipe, we want to see it! Tag us on social media and be sure to pin this recipe to your favorite boards on Pinterest so you never lose the secret to perfect crispy cheese edges. Happy cooking!