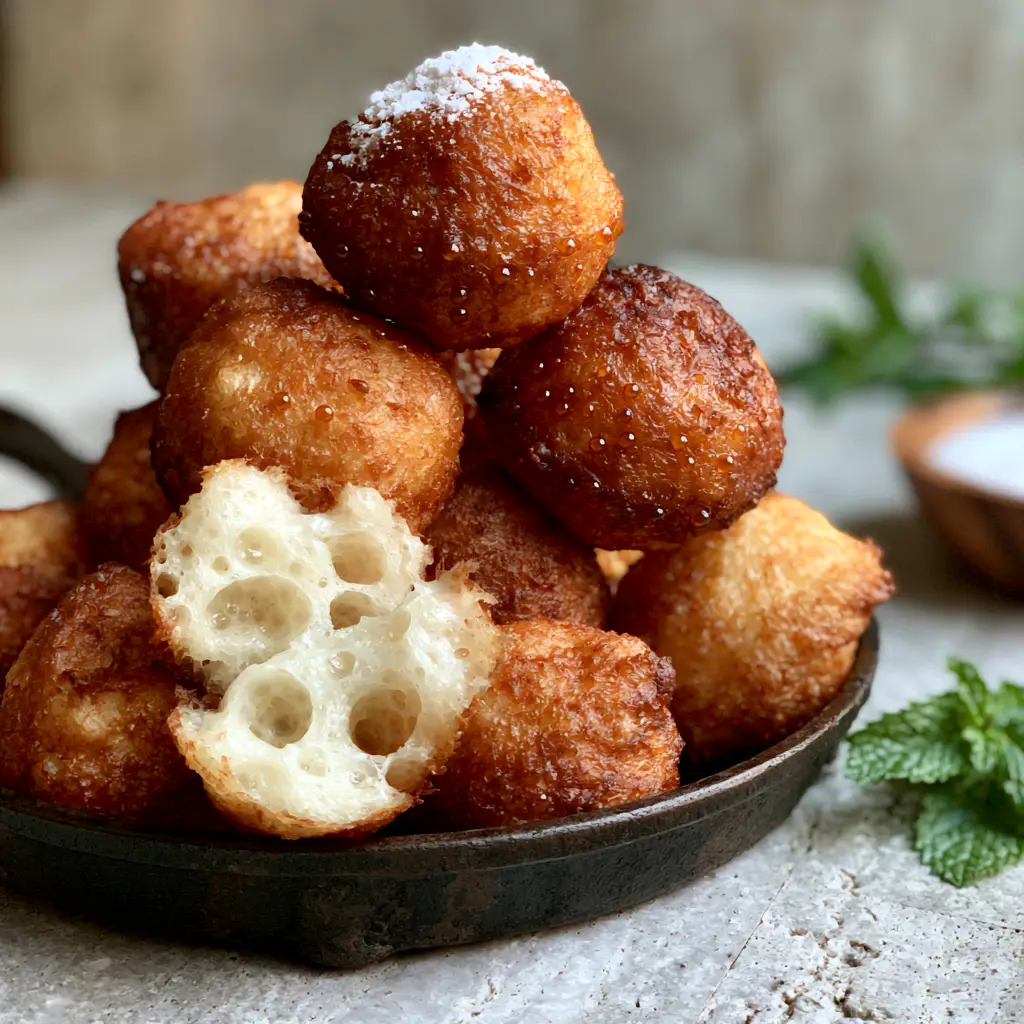
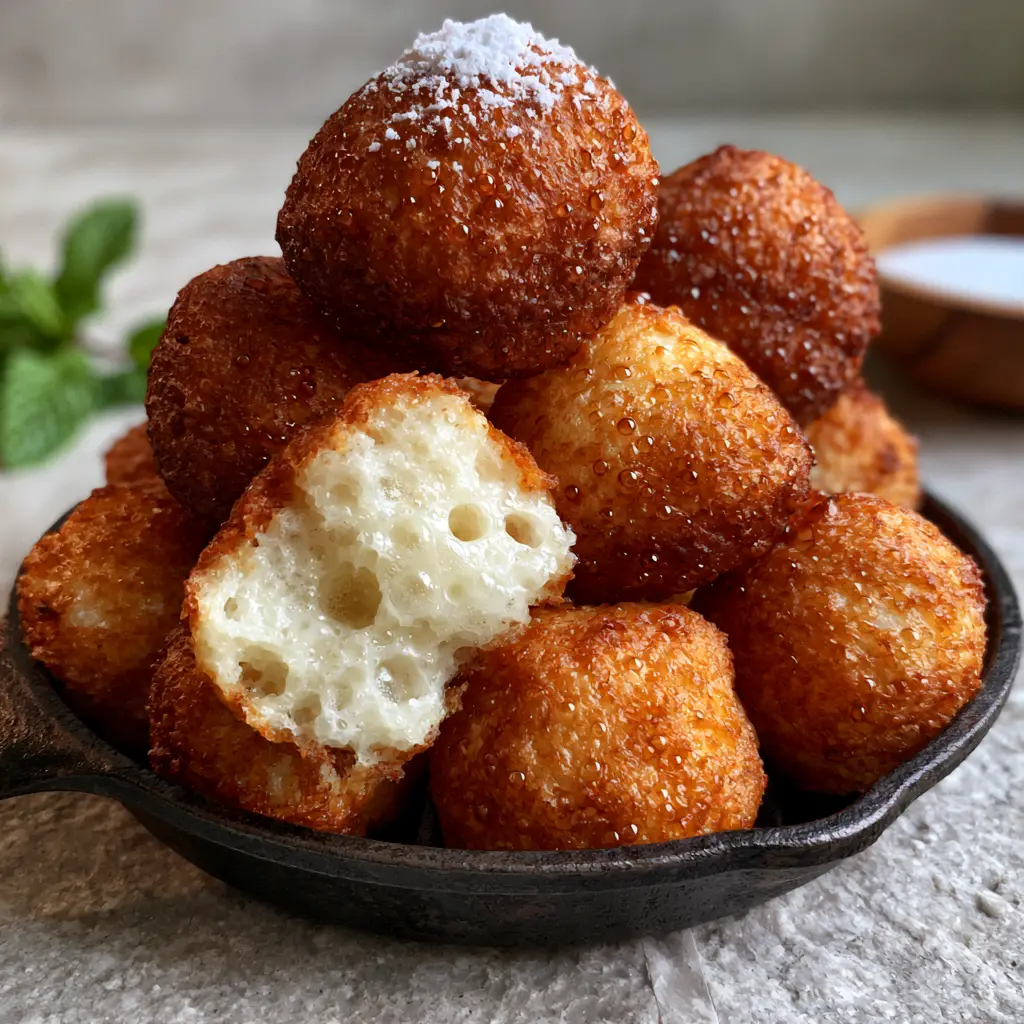
There is a specific kind of magic that happens when fermented rice batter meets a sizzling hot cast iron pan. Vitumbua, the iconic Tanzanian street food, are more than just rice cakes; they are a masterclass in textural contrast. Imagine a sphere with a deep golden-brown, shatteringly crisp exterior that gives way to a stark white, steaming, airy honeycomb interior.
If you have ever been captivated by the sight of steam rising from a freshly torn cake, revealing distinct fermentation bubbles, you know that Vitumbua is a sensory experience. This recipe captures that handheld aesthetic perfectly, delivering a snack that is naturally gluten-free, rich with coconut cream, and finished with a delicate dusting of powdered sugar.
Whether you are looking for a unique breakfast or a sweet afternoon treat, these coconut rice cakes bring the vibrant flavors of East Africa directly to your kitchen. Let’s dive into the science of fermentation and the art of the perfect sear to recreate this visual masterpiece.
Why You Will Fall in Love With These Golden Rice Spheres
- Shatter-Crisp Crust: The cast iron pan creates a signature golden-brown shell with a tiny visible oil glisten that provides a satisfying crunch in every bite.
- Honeycomb Crumb: Thanks to a traditional fermentation process, the interior is stark white, incredibly soft, and filled with airy pockets.
- Tropical Aromatics: The combination of rich coconut cream and a hint of warm spice creates an intoxicating scent that fills your home as they fry.
- Visually Stunning Garnish: While traditionally plain, our version features a fine powdered sugar dusting and fresh mint, making them look as good as they taste.
The Essential Ingredients for Authentic Tanzanian Vitumbua
Short-Grain White Rice: 2 cups (400g). You need a starchy rice like Jasmine or specialized Sona Masoori to achieve the structural integrity and soft crumb described in our visual blueprint.
Thick Coconut Milk: 1 cup (240ml). This provides the “hint of coconut cream” flavor and the necessary fats for that rich, tender mouthfeel inside the cake.
Granulated Sugar: 1/2 cup (100g). Sugar not only sweetens the batter but also aids in the caramelization process, ensuring we get that deep golden-brown crust.
Active Dry Yeast: 1 tsp (3g). This is the secret to the “stark white, steaming, airy honeycomb interior” as it creates the essential fermentation bubbles.
Ground Cardamom: 1/2 tsp (1g). A traditional addition that provides a floral, citrusy backbone that pairs beautifully with the coconut profile.
Neutral Frying Oil: 1/4 cup (60ml). Use a high-smoke point oil like vegetable or grapeseed to achieve the oil glisten without burning the delicate rice batter.
Powdered Sugar & Fresh Mint: For garnish. These provide the final visual “pop” seen in the smartphone-style photo, adding a touch of modern elegance.
The Specialized Tools for Spherical Success
To achieve the “perfectly spherical” look from our prompt, you absolutely need a Black Cast Iron Aebelskiver Pan. This pan features semi-spherical indentations that allow the Vitumbua to climb the sides as they rise, forming a ball.
You will also need a high-powered blender to process the soaked rice into a completely smooth, grit-free slurry. To flip the cakes, traditional cooks use thin wooden skewers, but a small offset spatula or even a knitting needle works perfectly to rotate them without deflating the air bubbles.
Mastering the Fermented Rice Batter
Soaking for Structural Integrity
Start by rinsing your 2 cups (400g) of rice until the water runs clear. Soak the rice in plenty of water for at least 8 hours, or overnight. This softens the grain to the core, ensuring your final crumb is white and soft rather than gritty.
Blending the Coconut Base
Drain the rice thoroughly and add it to your blender. Pour in 1 cup (240ml) of thick coconut milk, the sugar, cardamom, and a pinch of salt. Blend on high for 2-3 minutes until the mixture is as smooth as heavy cream; any grit will ruin the honeycomb texture.
The Fermentation Ritual
Whisk in your 1 tsp (3g) of yeast. Transfer the batter to a large bowl, cover it with a damp cloth, and let it rest in a warm, draft-free spot for 2 to 3 hours. You are looking for the batter to double in size and become highly aerated—this is what creates those “distinct fermentation bubbles.”
Frying to Golden-Brown Perfection
Preheating the Cast Iron
Place your black cast iron pan over medium-low heat. Add about 1/2 teaspoon (2.5ml) of oil into each well. Wait until the oil begins to shimmer; a hot pan is the only way to get that “crispy fried exterior” without the cakes sticking.
The Pour and the Rise
Fill each well about 3/4 of the way full with the bubbly batter. As the Vitumbua cook, you will see the edges turn opaque and tiny bubbles pop on the surface, just like a premium pancake recipe. Use a skewer to gently turn them 90 degrees, allowing more batter to flow down and create the sphere.
Achieving the Deep Glow
Continue rotating the cakes every minute until they form a complete ball. Fry until the entire exterior is a deep golden-brown. You should see a “tiny visible oil glisten” on the surface, indicating they are perfectly seared and ready to be removed.
Expert Tips for Visual and Sensory Cues
- Listen for the Sizzle: If the batter doesn’t sizzle immediately upon hitting the oil, your pan isn’t hot enough, and you won’t get that “shatter-crisp” crust.
- Watch the Steam: When you tear a Vitumbua open, “steam vapors” should escape immediately. This indicates the interior has reached the correct internal temperature.
- The Float Test: A perfectly fermented batter will feel light and almost “foamy” when you scoop it. If it feels heavy, let it ferment for another 30 minutes.
- Cast Iron Care: Keep your pan well-seasoned. A rustic black cast iron pan provides the best heat retention for even browning.
How to Serve and Pair Your Vitumbua
Vitumbua are traditionally served warm, directly from the pan. For a modern aesthetic, stack them in the cast iron pan and apply a “light, fine dusting of powdered sugar” as shown in our visual prompt. A sprig of fresh mint adds a vibrant green contrast to the golden cakes.
While these are often eaten alone, they make a fantastic side to savory dishes. The subtle sweetness of the coconut rice balances the heat of an authentic Egusi soup or a spicy curry. If you prefer a lighter pairing, try them alongside a crisp refreshing cucumber salad to cut through the richness of the fried crust.
For those who love a hearty breakfast, these rice cakes are a wonderful alternative to traditional breads when served with tender seasoned potatoes.
Storage and Reheating Guidelines
Vitumbua are best enjoyed within minutes of frying to appreciate the contrast between the hot steam and the crisp shell. However, you can store leftovers in an airtight container for up to 2 days.
To reheat, avoid the microwave as it will make the crust soggy. Instead, place them in a 350°F (175°C) oven or air fryer for 5 minutes until the exterior regains its crunch and the “stark white interior” becomes soft again.
Frequently Asked Questions
While a specialized spherical pan is traditional for the shape, you can fry them like small pancakes in a regular skillet. They won’t be spherical, but the flavor and honeycomb texture will remain the same.
The secret is using a cast iron pan and maintaining a medium-low heat. The cast iron distributes heat evenly, allowing the crust to brown deeply while the inside steams to perfection.
Yes! Authentic Vitumbua are made with rice, coconut milk, sugar, and yeast, making them naturally vegan and gluten-free.
Short-grain or medium-grain white rice like Jasmine or Sona Masoori works best because of the starch content. Avoid parboiled or long-grain converted rice, as they won’t produce the soft, airy interior.
This usually means your yeast was inactive or the fermentation time was too short. Ensure your yeast is fresh and let the batter sit in a warm spot until it is visibly foamy and doubled in size.
The Authentic Vitumbua Recipe
Vitumbua: The Ultimate Guide to Crispy Tanzanian Coconut Rice Cakes
Ingredients
Equipment
Method
- Rinse 2 cups (400g) of rice and soak in water for at least 8 hours or overnight until softened.
- Drain rice and blend with 1 cup (240ml) coconut milk, sugar, and cardamom until completely smooth. Stir in 1 tsp (3g) yeast.
- Cover and let the batter sit in a warm place for 2-3 hours until doubled in size and filled with fermentation bubbles.
- Heat a cast iron aebelskiver pan over medium-low and add 1/2 tsp oil to each well.
- Fill wells 3/4 full. Once edges are brown, use a skewer to rotate 90 degrees. Continue rotating until a golden-brown sphere forms.
- Dust with powdered sugar and garnish with fresh mint before serving hot.
Notes
Use a high-quality cast iron pan for the best crispy exterior crust.

Join Our Community of Home Cooks
We hope this guide helps you master the art of the Vitumbua. The combination of fermented rice and coconut is a timeless tradition that deserves a spot on your breakfast table. If you enjoyed this recipe, please leave a comment below and let us know how your fermentation bubbles turned out!
Don’t forget to follow us on Pinterest for more visually stunning and delicious recipes. Share your creations with the hashtag #PurelyHomecooked so we can see your golden-brown rice cakes!