There is a specific kind of morning magic that only golden butter waffles can conjure. Imagine standing in your sun-drenched kitchen, the soft side-lighting from the window catching the rising steam from a fresh stack of thick Belgian waffles.
You place a large, cold slab of salted yellow butter right in the center of the crown. As you watch, it begins to glisten and melt, its golden liquid pooling into the deep, dark wells of the waffle ridges.
This isn’t just breakfast; it is a sensory experience defined by a shatter-crisp exterior and a cloud-like, aerated interior. We are going to achieve that intense deep golden-brown crust that resonates with an audible crunch when your fork first makes contact.
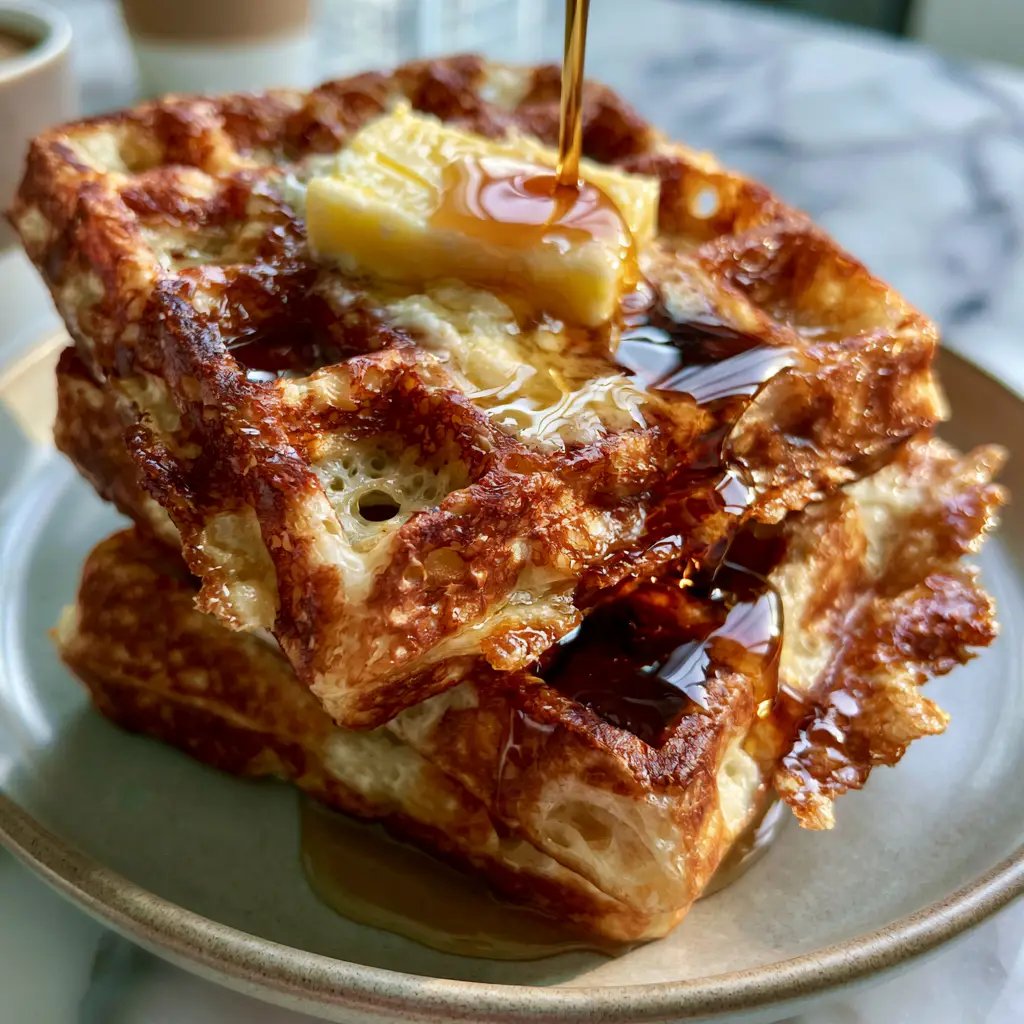
The Anatomy of a Perfect Golden Butter Waffle
What separates a mediocre waffle from a world-class golden butter waffles experience? It comes down to the structural integrity of the batter and the precision of the heat.
To achieve the “shatter-crisp” texture mentioned in our visual blueprint, we rely on a specific ratio of fats to starches. The goal is a waffle that stands tall on a matte ceramic plate without losing its structural rigidity under the weight of thick amber syrup.
- Shatter-Crisp Texture: Achieved through the inclusion of cornstarch and a high-heat sear in the waffle iron.
- Deep Golden Color: The result of the Maillard reaction, fueled by the natural sugars in the batter and the high fat content of the butter.
- Aerated Interior: Created by folded-in whipped egg whites, ensuring the waffle feels light despite its crispy exterior.
- Visual Contrast: The high-gloss reflection of dark amber maple syrup cascading over high-contrast peaks.
The Secret Pantry Staples for Shatter-Crisp Waffles
Every ingredient in this recipe serves a forensic purpose to match our visual goal. We don’t just want flavor; we want the specific aesthetics of a professional food photograph.
All-Purpose Flour (250g / 2 cups): This provides the gluten structure necessary to hold those deep Belgian wells without collapsing under the syrup pour.
Cornstarch (60g / ½ cup): This is the secret to the “shatter-crisp” ridges. Cornstarch inhibits excessive gluten development, resulting in a drier, crunchier crust.
Melted Unsalted Butter (115g / ½ cup): While we top the dish with salted butter, we use unsalted butter in the batter to precisely control the sodium levels and fat content.
Buttermilk (480ml / 2 cups): The acidity in buttermilk reacts with the leavening agents to create those delicate aerated holes seen in the cross-section.
Granulated Sugar (25g / 2 tbsp): Beyond sweetness, sugar is the primary driver of the deep golden-brown crust through caramelization.
Large Eggs (2 units): We will separate these, using the yolks for richness and the whites for the airy, structural lift that makes these waffles legendary.
Baking Powder (10g / 2 tsp) & Baking Soda (3g / ½ tsp): This dual-leavening approach ensures an immediate rise the moment the batter hits the hot iron.
Sea Salt (3g / ½ tsp): A foundational element that sharpens the flavor profile and balances the sweetness of the amber maple syrup.
Vanilla Bean Paste (5ml / 1 tsp): Provides those beautiful dark specks and a sophisticated aromatic profile that pairs perfectly with a morning coffee cup.
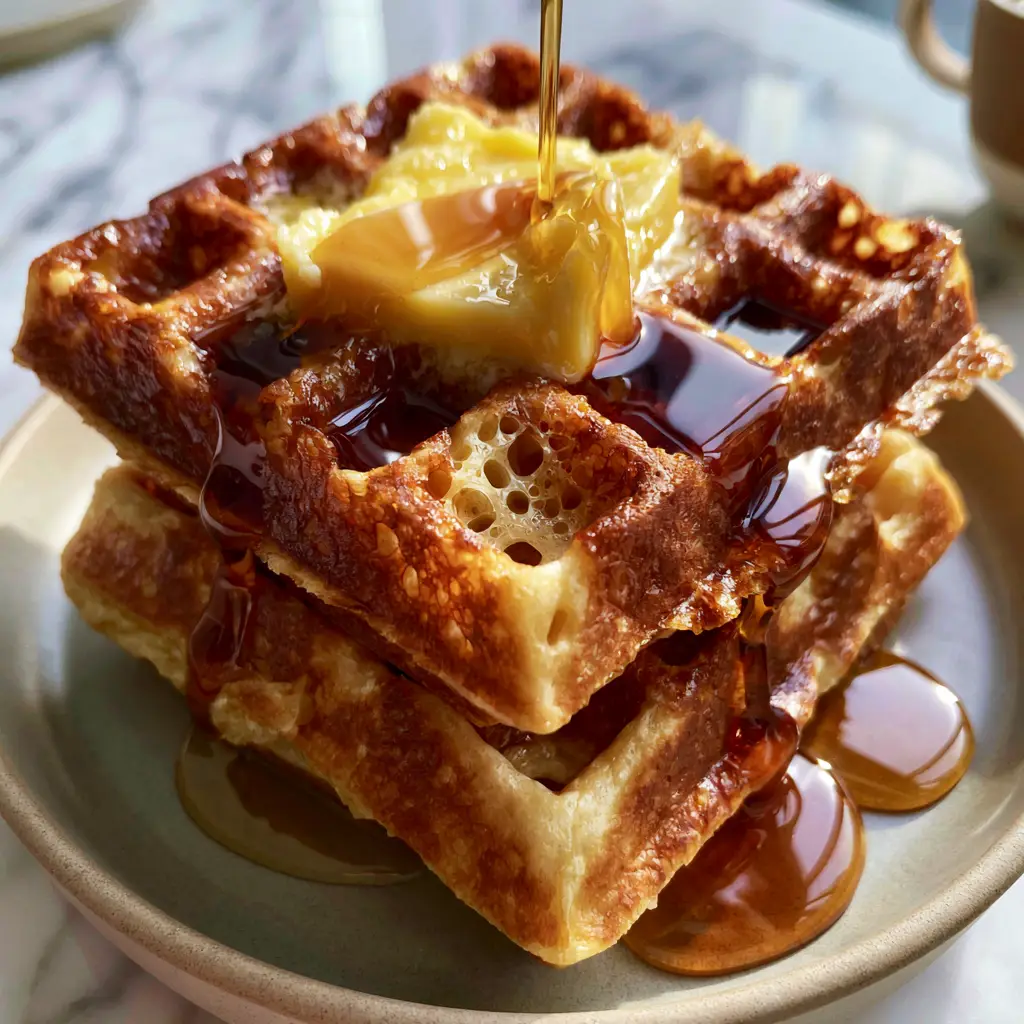
Essential Equipment for Professional Belgian Results
To replicate the high-contrast highlights and crispy peaks of our visual prompt, you need the right tools. A standard thin waffle iron will not yield the “deep wells” we are looking for.
You will need a Deep-Pocket Belgian Waffle Maker. These machines have higher grids that allow the batter to expand vertically, creating that signature airy interior and thick profile.
A Stainless Steel Whisk and a Large Metal Mixing Bowl are essential for aerating the wet ingredients. For the egg whites, an Electric Hand Mixer will save your forearms and ensure you reach stiff peaks quickly.
Finally, a Matte Ceramic Plate is the ideal staging ground. The matte finish prevents distracting glare in your food photography while making the glistening, partially melted butter slab the star of the show.
Step-by-Step Guide to Achieving Waffle Perfection
Preparing the Dry Base for Maximum Crunch
Begin by sifting your flour, cornstarch, sugar, salt, and leavening agents into a large bowl. Sifting is non-negotiable here; it ensures there are no clumps of cornstarch, which could lead to uneven browning.
Use a whisk to aerate the dry mixture. This creates a “light” foundation that will eventually house the delicate air bubbles we’re going to fold in later.
The Secret to the Aerated Interior
Separate your eggs, placing the yolks in one small bowl and the whites in a clean, grease-free glass bowl. Whisk the buttermilk, melted butter, and egg yolks together until emulsified.
Now, beat the egg whites until they form stiff peaks. This is the “invisible ingredient” that creates the aerated holes visible in our visual blueprint. When you fold these in, do it gently with a spatula—do not overmix or you will deflate the waffles.
Executing the Intense Deep Golden-Brown Crust
Preheat your waffle iron to its highest setting. Most home cooks under-heat their irons, resulting in pale, floppy waffles. Wait for the indicator light, then wait another two minutes.
Pour the batter into the center, allowing it to spread slightly toward the edges. Close the lid and resist the urge to peek. The “visual cue” for readiness is the steam; when the steam stops escaping the sides, the waffles are nearing their shatter-crisp peak.
Look for a deep golden-brown color on the ridges. The square ridges should look almost caramelized, with visible texture that suggests a brittle, crunchy snap.
Expert Tips for Success with Golden Butter Waffles
- The Steam Rule: Never open the waffle iron until the steam has almost completely subsided. Opening too early tears the delicate aerated interior.
- Resting the Batter: Let your batter sit for 5-10 minutes before cooking. This allows the flour to hydrate fully, leading to a more uniform crumb.
- Cooling Rack Trick: If you aren’t serving immediately, place the finished waffles on a wire cooling rack in a 200°F (95°C) oven. Never stack them directly on a plate while hot, or the steam will turn the crispy edges soggy.
- The Butter Temperature: For that perfect “partially melted” look, use a slab of cold salted butter. The heat of the waffle will melt the bottom, but the top will remain defined and glistening for the perfect photo.
Elevating Your Breakfast Presentation
To match the visual of our golden butter waffles, placement is everything. Stack exactly two waffles at a slight offset on your matte ceramic plate.
Place the butter slab in the center so it interacts with the square wells. Use a high-quality Grade A Dark Amber maple syrup for that high-gloss reflection. If you enjoy a variety of textures in your breakfast, consider how these waffles compare to our fluffy pancake recipe, which offers a softer, cake-like experience.
For those who prefer a savory start, these waffles serve as an incredible base for butter chicken for a fusion “Chicken and Waffles” brunch that will impress any guest.
Storage, Reheating, and Freezing Advice
While golden butter waffles are best enjoyed immediately, they are surprisingly resilient. You can store leftovers in an airtight container in the refrigerator for up to 3 days.
To reheat, avoid the microwave at all costs; it will destroy the shatter-crisp texture. Instead, pop them back into a toaster or a 350°F (175°C) oven for 5 minutes until the exterior recrisps.
To freeze, flash-freeze them in a single layer on a baking sheet before transferring to a freezer bag. They will stay fresh for up to 2 months. You can toast them directly from frozen for a quick late-night snack or a busy morning meal.
What to Serve With This Buttery Stack
To balance the richness of the golden butter waffles, consider serving them alongside something bright and acidic. A side of crispy cucumber and onion salad might seem unconventional, but the vinegar cut through the fat of the butter perfectly.
If you are hosting a full brunch spread, these waffles pair beautifully with a hearty zucchini casserole or even some roasted sheet pan asparagus for a sophisticated touch.
Of course, no Belgian breakfast is complete without a morning coffee cup, preferably a dark roast that can stand up to the thick amber maple syrup.
Frequently Asked Questions
Yes, but you should reduce the added sea salt by half to ensure the waffles aren’t overly savory, especially since we top them with a salted butter slab.
While not strictly mandatory for taste, whipping egg whites is essential for the ‘airy waffle interior’ and delicate aerated holes seen in professional food photography.
Ensure your iron is fully preheated and has a good non-stick coating. Adding enough melted butter to the batter itself also helps the waffle release cleanly from the ridges.
The deep golden-brown color comes from the Maillard reaction. Ensure your batter has enough sugar and fat, and cook the waffles until the steam completely stops escaping the iron.
Waffles often turn out soft if the iron isn’t hot enough or if there is too much moisture in the batter. Using cornstarch and whipping your egg whites helps create a shatter-crisp exterior.
The Ultimate Golden Butter Waffles Recipe

Golden Butter Waffles: The Ultimate Shatter-Crisp Belgian Recipe
Ingredients
Equipment
Method
- Sift the flour, cornstarch, sugar, baking powder, baking soda, and salt into a large bowl. Whisk to combine.
- In a separate bowl, whisk together the buttermilk, melted unsalted butter, vanilla, and egg yolks until smooth.
- In a clean bowl, beat the egg whites until stiff peaks form. Set aside.
- Fold the wet ingredients into the dry ingredients until just combined. Gently fold in the whipped egg whites, leaving a few streaks of white to maintain aeration.
- Preheat your Belgian waffle iron to its highest setting. Lightly grease if necessary.
- Pour batter into the center of the iron. Close and cook until the steam stops and the waffles reach an intense deep golden-brown crust with shatter-crisp ridges.
- Stack two waffles on a matte ceramic plate. Top with a large slab of salted yellow butter and pour thick dark amber maple syrup over the crispy peaks.
Notes
Do not stack waffles while hot unless serving immediately; use a wire rack to keep them shatter-crisp.
Closing & Call to Action
Mastering golden butter waffles is a rite of passage for every home cook. The contrast between the intense deep golden-brown crust and the airy waffle interior is a culinary achievement that brings joy to any breakfast table.
Did you achieve that perfect shatter-crisp texture? We want to see your results! Leave a comment below and tell us how yours turned out. Don’t forget to follow us and share your creations to Pinterest so others can enjoy this buttery goodness!